How to Use Xvox in GarageBand on macOS
Below are the steps to load Xvox as an insert in GarageBand on macOS:
Before You Begin:
Make sure you have successfully installed Xvox by following these steps.
Make sure GarageBand was completely closed on your computer while installing Xvox.
Step 1
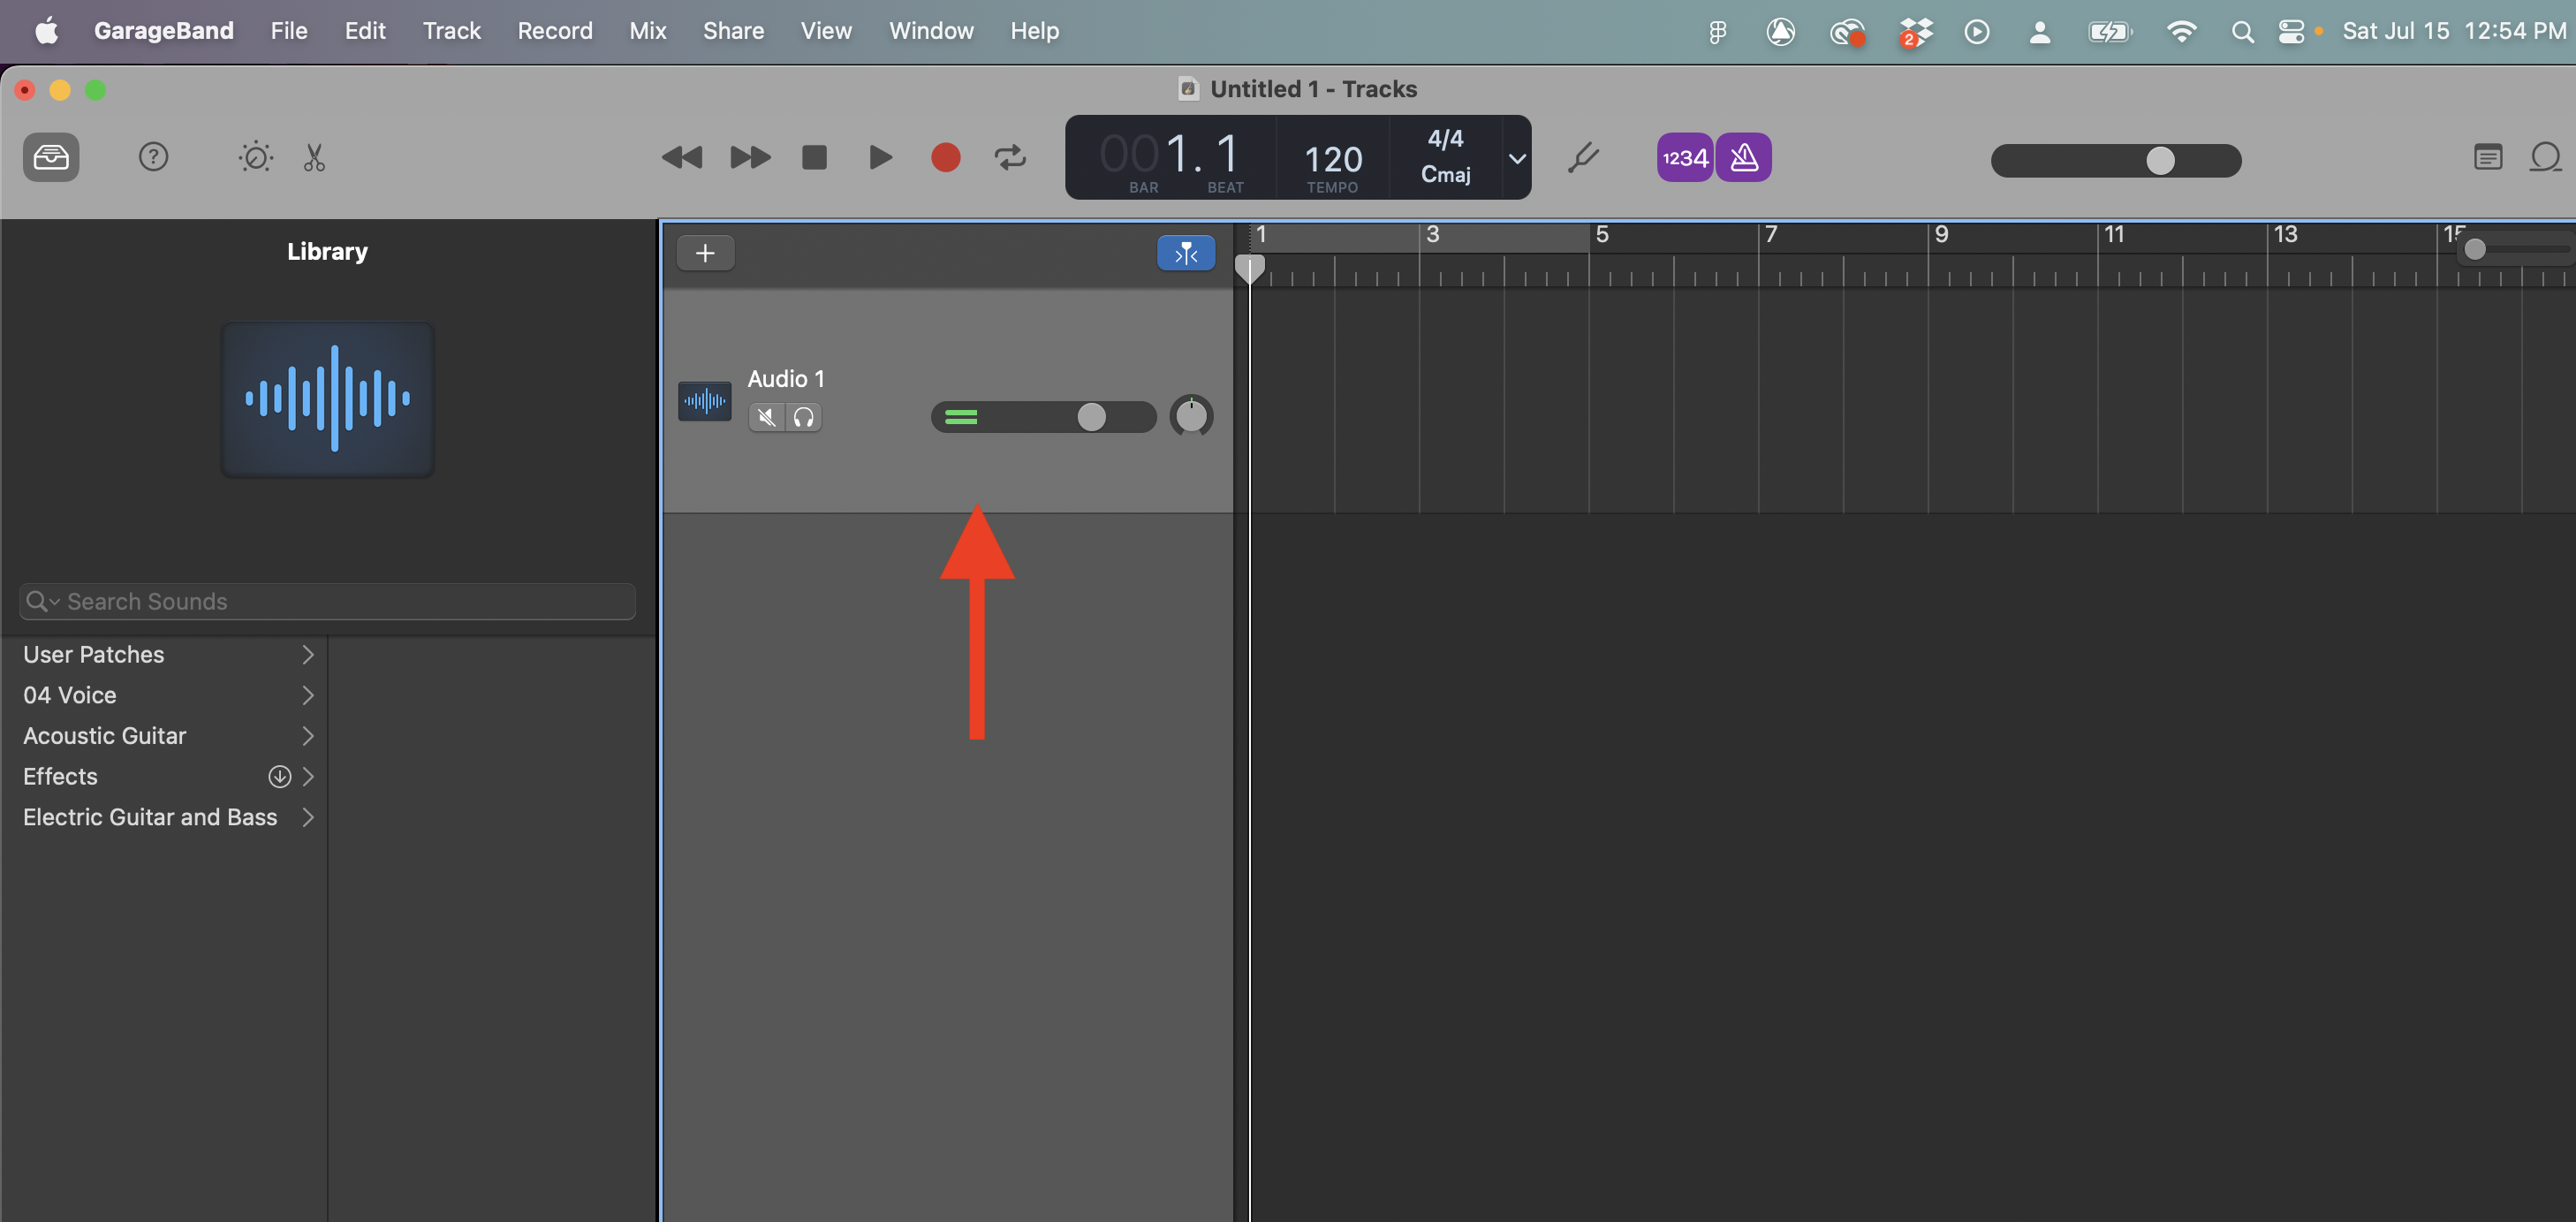
Click on the Audio Track in GarageBand that you would like to load Xvox on.
Step 2
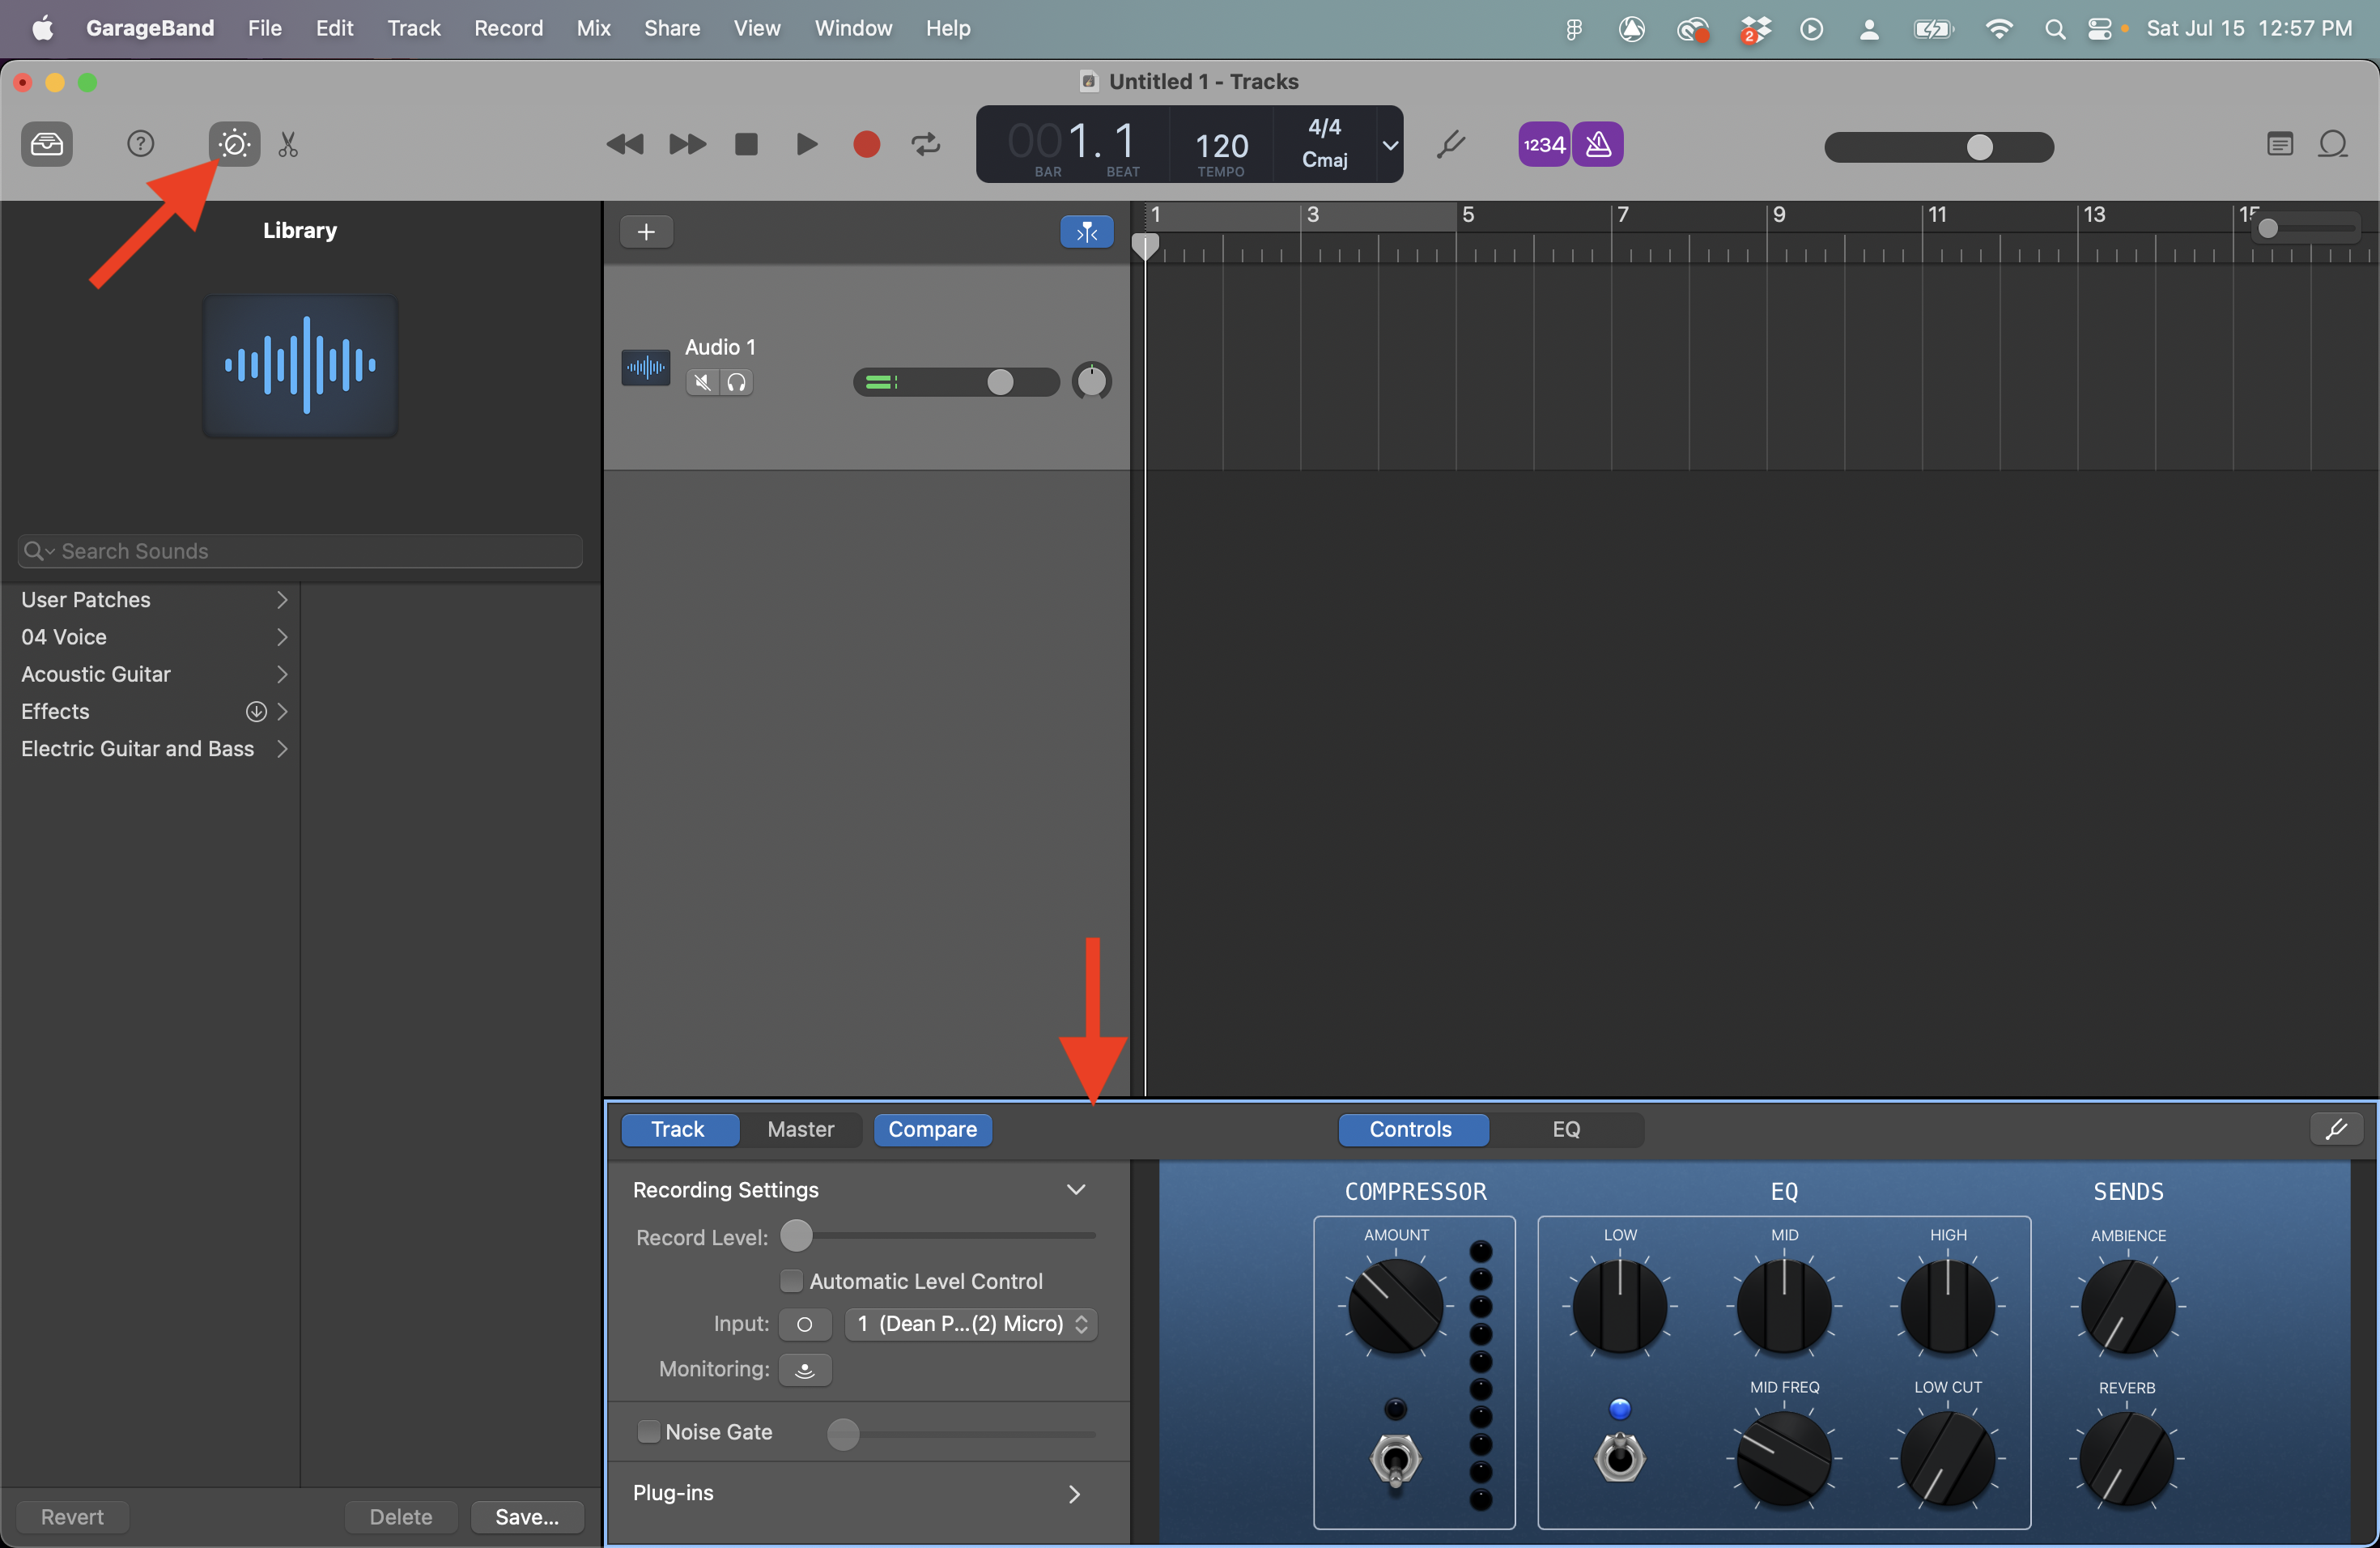
Make sure the Smart Controls button is turned on in the top bar of GarageBand. This will bring up the Smart Controls panel at the bottom of your screen.
Step 3
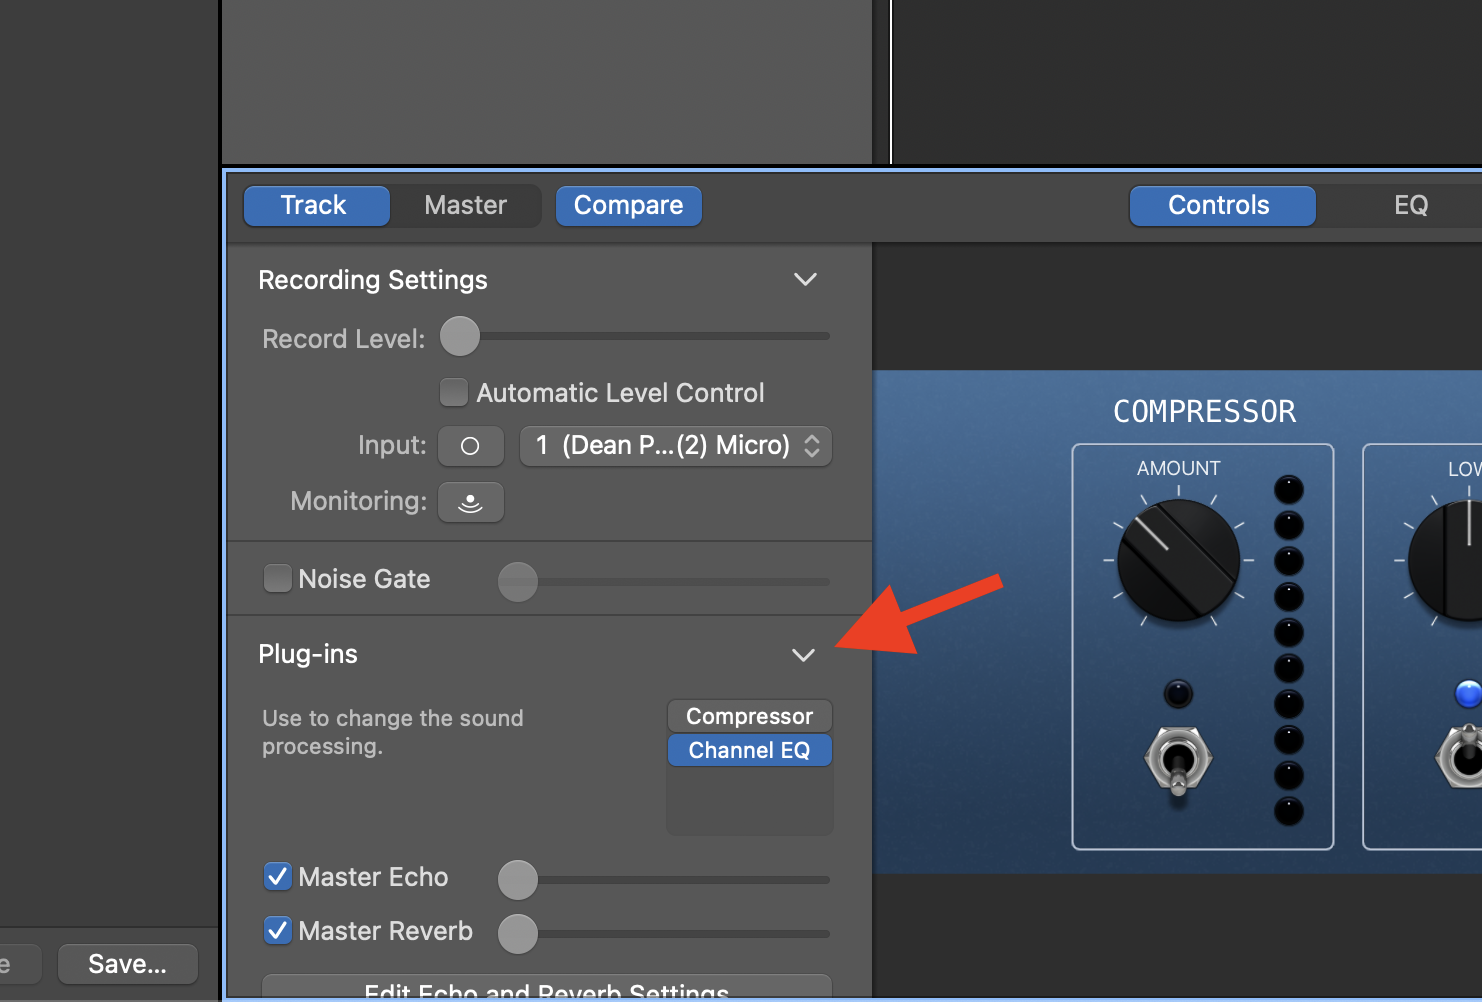
Click the Toggle Arrow to show your Plug-ins.
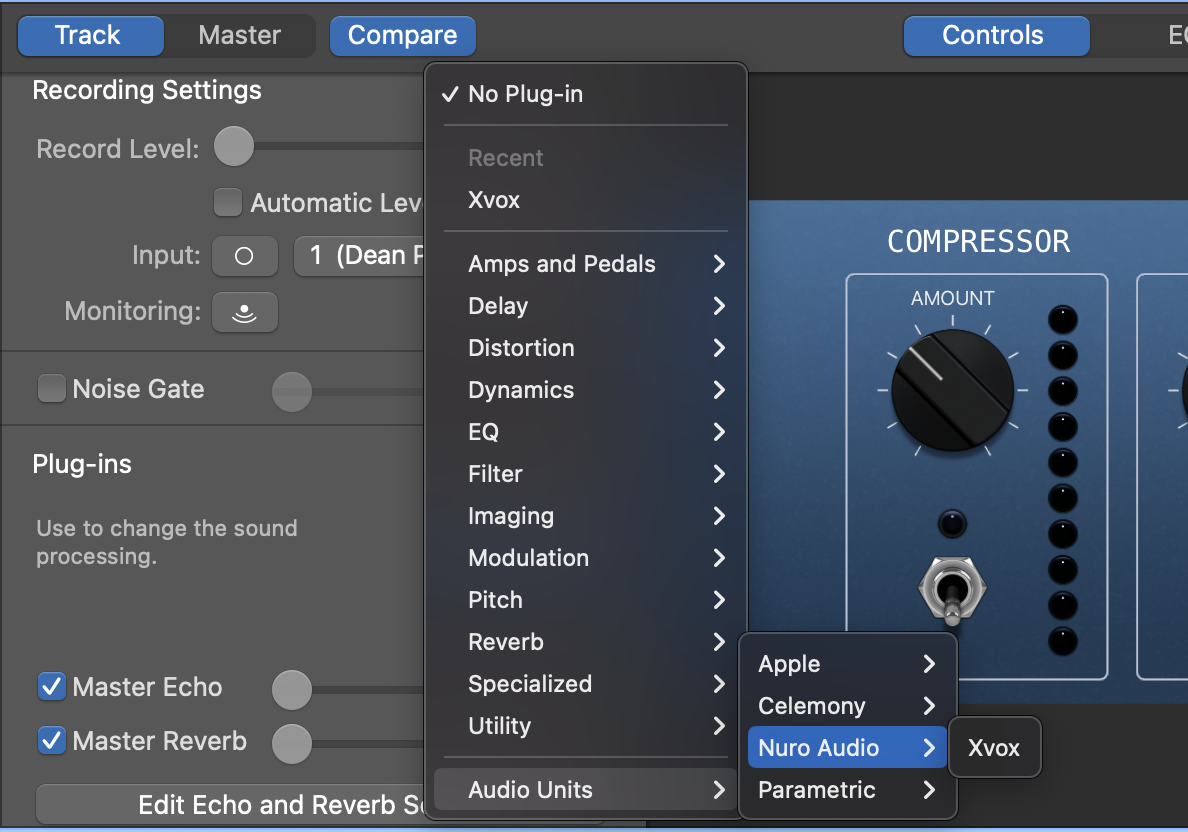
Step 4
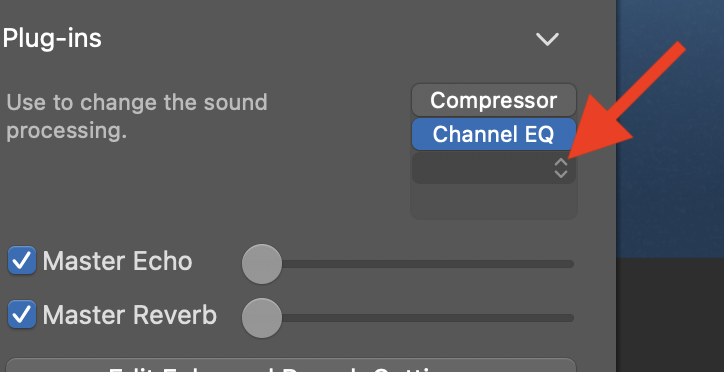
Click on an empty insert slot. Then navigate to Audio Units > Nuro Audio > Xvox. Click on Xvox to load it.
Don't See Audio Units as an option?
If you don't see the Audio Units option, go to GarageBand > Settings in the menu bar. Then, in the Audio / MIDI tab, make sure Enable Audio Units is checked.

See Audio Units, but don't see Nuro Audio or Xvox listed?
Ensure that GarageBand is completely Quit by going to GarageBand > Quit GarageBand in the menu bar. Then, re-install Xvox. After the installation is successful, re-open GarageBand and follow these steps again to load it on an Audio Track.
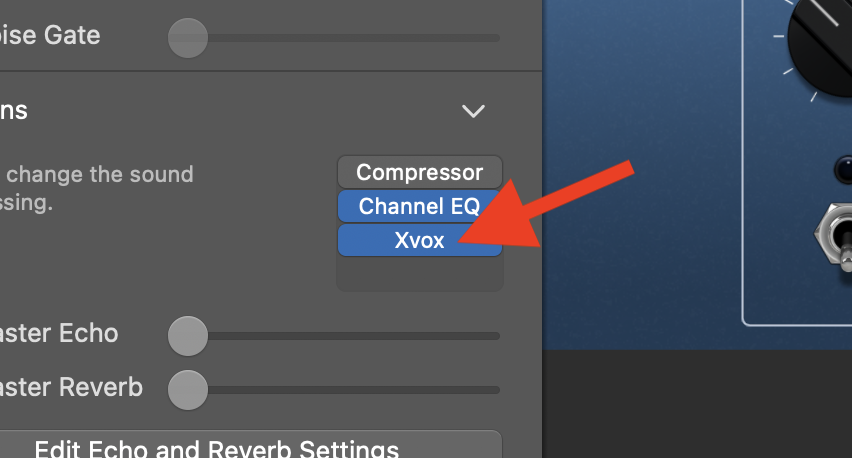
Step 5
Load the Xvox GUI by clicking on the insert.
Don't see the GUI / Xvox controls when you open it?
Go to GarageBand > Settings in the Menu bar. Then, in the General tab, make sure Open plug-ins in Controls view by default is unchecked.
